Arduino two weel self Balancing Robot
This is a relatively simple, visually effective balancing robot project that only requires four components to make. Detailed video, instructions, schematic, and code at:
Tạo bởi
admin

Khoá học bao gồm:
-
Certificate of completion -
Certificate of completion -
Certificate of completion
Những gì bạn đặt được sau khoá học
Master JavaScript fundamentals including ES6+ features
Master JavaScript fundamentals including ES6+ features
Project description
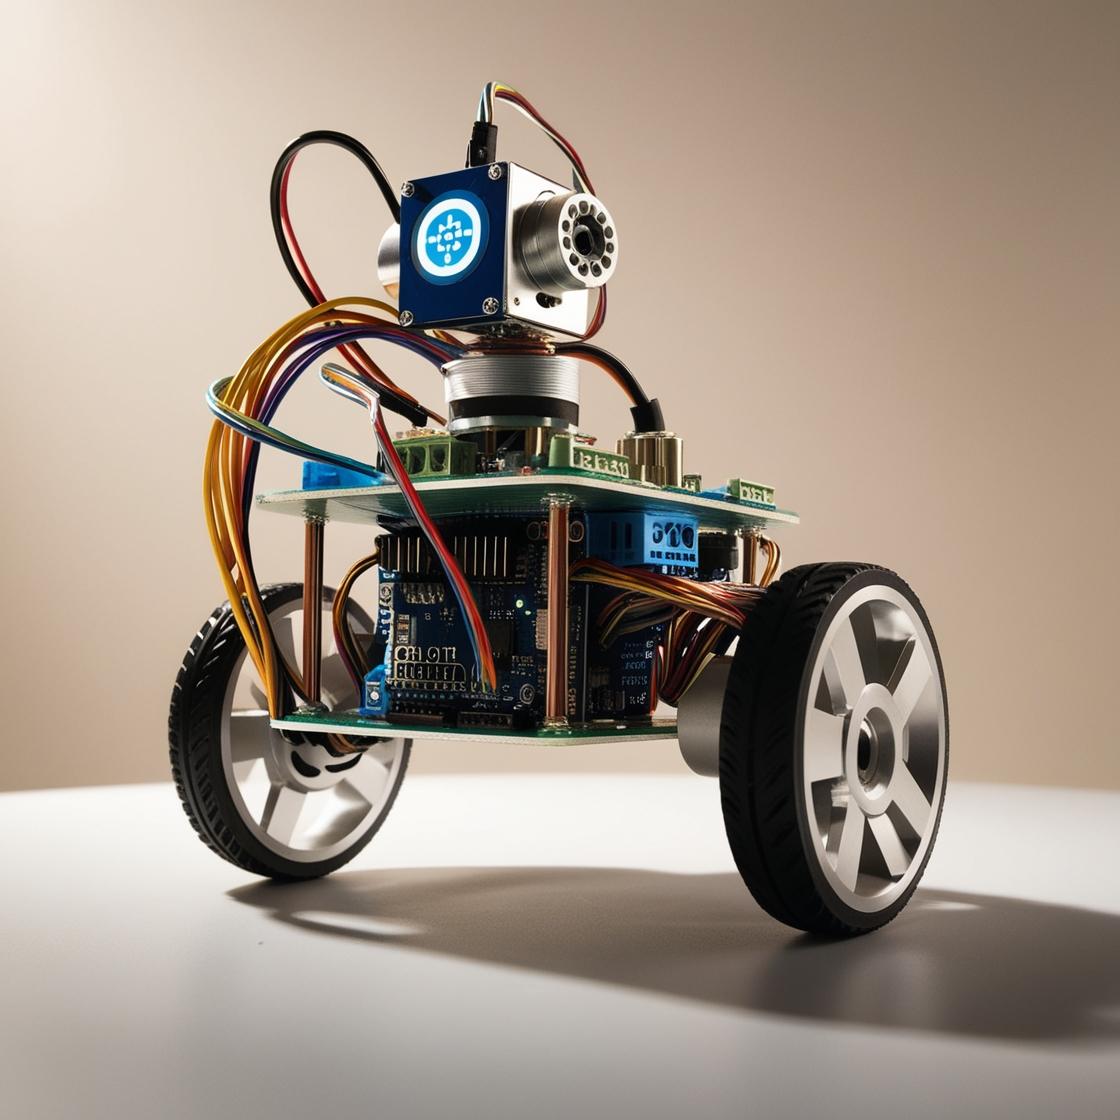
Self Balancing Robot is device that can balance itself from falling to the ground. Its function is to maintain balance using the motor’s axis movement of the wheels and body. There are several types of self-balancing robots, and in this particular case I will present you a way to make a Two-Wheeled Balancing Robot. Actually, I made this robot together with one of my students and it is a high school graduation project. This is the simplest type of balancing robot and only requires a few components to build.
First, let’s explain the components used and their functions.
– MPU6050 Accelerometer and Gyroscope sensor with Micro Electro Mechanical System(MEMS) technology, which is used to detect angle of tilt or inclination along the X, Y and Z axes.
– The information from this sensor is transmitted to a microcontroller, and in our case it is an Arduino Uno board. This board is the brain of the robot, processes the sensor data and determines the actions needed to keep the robot upright.
– Processed data from the Arduino is sent to the motor driver board, which in our case is the L298N 5AD type. A motor driver circuit controls the direction and speed of the motors.
– This robot uses two DC motors, each connected to a wheel. These motors adjust the speed of the wheels to correct the robot’s tilt.
– and power source, specifically two Lithium batteries connected in series wich provides energy to the motors and electronics. All components are mounted on a suitable supporting structure made of 5mm thick PVC board.
To obtain this value, we need to hold the robot in an ideal vertical position, perpendicular to the surface, and read the required value on the serial monitor. In my case, it is about 18 2
Finally, we need to experimentally determine the values of Kp, Kd, and Ki, needed for PID control.
#include "I2Cdev.h"
#include
#include "MPU6050_6Axis_MotionApps20.h" //https://github.com/jrowberg/i2cdevlib/tree/master/Arduino/MPU6050
MPU6050 mpu;
// MPU control/status vars
bool dmpReady = false; // set true if DMP init was successful
uint8_t mpuIntStatus; // holds actual interrupt status byte from MPU
uint8_t devStatus; // return status after each device operation (0 = success, !0 = error)
uint16_t packetSize; // expected DMP packet size (default is 42 bytes)
uint16_t fifoCount; // count of all bytes currently in FIFO
uint8_t fifoBuffer[64]; // FIFO storage buffer
// orientation/motion vars
Quaternion q; // [w, x, y, z] quaternion container
VectorFloat gravity; // [x, y, z] gravity vector
float ypr[3]; // [yaw, pitch, roll] yaw/pitch/roll container and gravity vector
/*********Tune these 4 values for your BOT*********/
double setpoint= 182; //set the value when the bot is perpendicular to ground using serial monitor.
//Read the project documentation on circuitdigest.com to learn how to set these values
double Kp = 15; //21 Set this first
double Kd = 0.9; //0.8 Set this secound
double Ki = 140; //140 Finally set this
/******End of values setting*********/
double input, output;
PID pid(&input, &output, &setpoint, Kp, Ki, Kd, DIRECT);
volatile bool mpuInterrupt = false; // indicates whether MPU interrupt pin has gone high
void dmpDataReady()
{
mpuInterrupt = true;
}
void setup() {
Serial.begin(115200);
// initialize device
Serial.println(F("Initializing I2C devices..."));
mpu.initialize();
// verify connection
Serial.println(F("Testing device connections..."));
Serial.println(mpu.testConnection() ? F("MPU6050 connection successful") : F("MPU6050 connection failed"));
// load and configure the DMP
devStatus = mpu.dmpInitialize();
// supply your own gyro offsets here, scaled for min sensitivity
mpu.setXGyroOffset(-479);
mpu.setYGyroOffset(84);
mpu.setZGyroOffset(15);
mpu.setZAccelOffset(1638);
// make sure it worked (returns 0 if so)
if (devStatus == 0)
{
// turn on the DMP, now that it's ready
Serial.println(F("Enabling DMP..."));
mpu.setDMPEnabled(true);
// enable Arduino interrupt detection
Serial.println(F("Enabling interrupt detection (Arduino external interrupt 0)..."));
attachInterrupt(0, dmpDataReady, RISING);
mpuIntStatus = mpu.getIntStatus();
// set our DMP Ready flag so the main loop() function knows it's okay to use it
Serial.println(F("DMP ready! Waiting for first interrupt..."));
dmpReady = true;
// get expected DMP packet size for later comparison
packetSize = mpu.dmpGetFIFOPacketSize();
//setup PID
pid.SetMode(AUTOMATIC);
pid.SetSampleTime(10);
pid.SetOutputLimits(-255, 255);
}
else
{
// ERROR!
// 1 = initial memory load failed
// 2 = DMP configuration updates failed
// (if it's going to break, usually the code will be 1)
Serial.print(F("DMP Initialization failed (code "));
Serial.print(devStatus);
Serial.println(F(")"));
}
//Initialise the Motor outpu pins
pinMode (6, OUTPUT);
pinMode (9, OUTPUT);
pinMode (10, OUTPUT);
pinMode (11, OUTPUT);
//By default turn off both the motors
analogWrite(6,LOW);
analogWrite(9,LOW);
analogWrite(10,LOW);
analogWrite(11,LOW);
}
void loop() {
// if programming failed, don't try to do anything
if (!dmpReady) return;
// wait for MPU interrupt or extra packet(s) available
while (!mpuInterrupt && fifoCount < packetSize)
{
//no mpu data - performing PID calculations and output to motors
pid.Compute();
//Print the value of Input and Output on serial monitor to check how it is working.
Serial.print(input); Serial.print(" =>"); Serial.println(output);
if (input>150 && input<200){//If the Bot is falling
if (output>0) //Falling towards front
Forward(); //Rotate the wheels forward
else if (output<0) //Falling towards back
Reverse(); //Rotate the wheels backward
}
else //If Bot not falling
Stop(); //Hold the wheels still
}
// reset interrupt flag and get INT_STATUS byte
mpuInterrupt = false;
mpuIntStatus = mpu.getIntStatus();
// get current FIFO count
fifoCount = mpu.getFIFOCount();
// check for overflow (this should never happen unless our code is too inefficient)
if ((mpuIntStatus & 0x10) || fifoCount == 1024)
{
// reset so we can continue cleanly
mpu.resetFIFO();
Serial.println(F("FIFO overflow!"));
// otherwise, check for DMP data ready interrupt (this should happen frequently)
}
else if (mpuIntStatus & 0x02)
{
// wait for correct available data length, should be a VERY short wait
while (fifoCount < packetSize) fifoCount = mpu.getFIFOCount();
// read a packet from FIFO
mpu.getFIFOBytes(fifoBuffer, packetSize);
// track FIFO count here in case there is > 1 packet available
// (this lets us immediately read more without waiting for an interrupt)
fifoCount -= packetSize;
mpu.dmpGetQuaternion(&q, fifoBuffer); //get value for q
mpu.dmpGetGravity(&gravity, &q); //get value for gravity
mpu.dmpGetYawPitchRoll(ypr, &q, &gravity); //get value for ypr
input = ypr[1] * 180/M_PI + 180;
}
}
void Forward() //Code to rotate the wheel forward
{
analogWrite(6,output);
analogWrite(9,0);
analogWrite(10,output);
analogWrite(11,0);
Serial.print("F"); //Debugging information
}
void Reverse() //Code to rotate the wheel Backward
{
analogWrite(6,0);
analogWrite(9,output*-1);
analogWrite(10,0);
analogWrite(11,output*-1);
Serial.print("R");
}
void Stop() //Code to stop both the wheels
{
analogWrite(6,0);
analogWrite(9,0);
analogWrite(10,0);
analogWrite(11,0);
Serial.print("S");
}
For this purpose we set all three values to zero. Now we put some value for Kp and perform testing. Too little Kp will make robot fall over. Too much Kp will make the robot go back and forth wildly. A good Kp will make the robot go slightly back and forth. Next we need to set Kd. A gooD Kd value will lessen the oscilation until the robot is almost steady, and will keep the robot standing. Lastly set the Ki. The correct Ki value will shorten the time it takes for the robot to stabilize. I want to emphasize that the surface needs to be rough enough to increase the friction between it and the wheels.
And finally a short conclusion. This is a relatively simple, visually effective balancing robot project that only requires 3 components to make. However, its setup, although it can be time-consuming, is still a lot of fun trying to get the robot to stand steadily on its “own feet”. Just to mention that we created this project together with my students as a final high school exam.
Giáo trình
Course Overview
4 bài giảng . 20 phút
Introduction to the Course
10:30
Introduction to the Course
Introduction to the Course
10:30
Introduction to the Course
Introduction to the Course
10:30
Introduction to the Course
Introduction to the Course
10:30
Introduction to the Course
Requirements
- Basic understanding of HTML and CSS
- Basic understanding of HTML and CSS
- Basic understanding of HTML and CSS
Instructor
Gia Huy
Senior JavaScript Developer & Educator
David has been working with JavaScript for over 10 years and has taught more than 50,000 students online. He currently works as a senior developer at a leading tech company and is passionate about sharing his knowledge with others. His teaching style focuses on practical, real-world applications of JavaScript concepts, ensuring students not only understand the theory but can apply it in their own projects.
Frequently Asked Questions
Warning: Undefined array key "q" in /home/xs693666/ichidemo.info/public_html/demo2.ichidemo.info/wp-content/themes/innovators/single-course.php on line 340
Warning: Undefined array key "a" in /home/xs693666/ichidemo.info/public_html/demo2.ichidemo.info/wp-content/themes/innovators/single-course.php on line 346


Ready to Master JavaScript?
Join over 18,000 students who have transformed their careers with this comprehensive JavaScript course.